
Connection cleaning and replacement tools and techniques
This page is to be used along with my instructions for installing terminals with my CR1 crimper. While other crimpers can be
used the information on the terminal installation page is still very useful.
Most electrical be it charging or ignition problems on old motorcycle can be traced to dirty corroded or burnt connections.
When a pair of connecting terminals corrode, it takes more power to bridge the connection and the power lost becomes heat
that more often than not melts the plugs. If your bike has a mysterious charging system or ignition problem, more likely
than not, it's in the connections.
On this page you will see me using copious amounts of dielectric grease while repairing these connections. While this stuff isn't cheap it's not all that
expensive and has to be the best kept secret for protecting connections. If Honda had used dielectric grease on the connections from the factory, this
problem would be virtually unknown.
If you take the time to clean all the electrical connections in your bike and properly pack them with dielectric grease, you will never have this problem
again.
I've been looking for a bike to use for this project for over a year. Recently I bought a 1975 Goldwing (with and 1100 engine) to use to test a couple of new
products on. The electrical system on this bike was trash making it a perfect fixer upper project for a guy like me.
Here are some tools you will need to do the job.
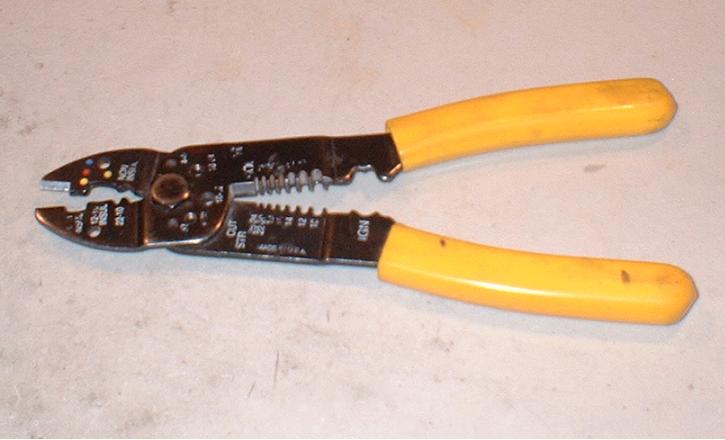
This type of wire stripper / cutter can be found at most tool or auto parts stores. This particular tool is of higher
quality than the run of the mill ones found in most places.
While the cheap ones will do the job in the short run good tools don't cost they pay. I spent $25 for this tool 5
years ago and while the white lettering is worn, the cutting surfaces are as sharp as the day I bought it. I use
this tool almost every day and I wouldn't be without it.
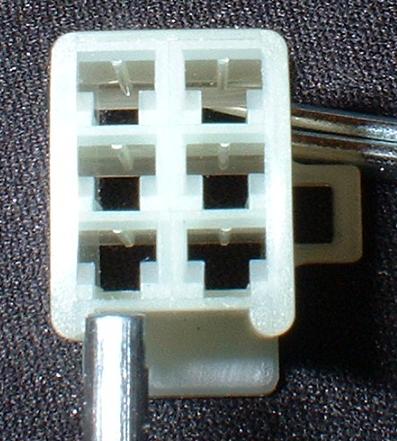
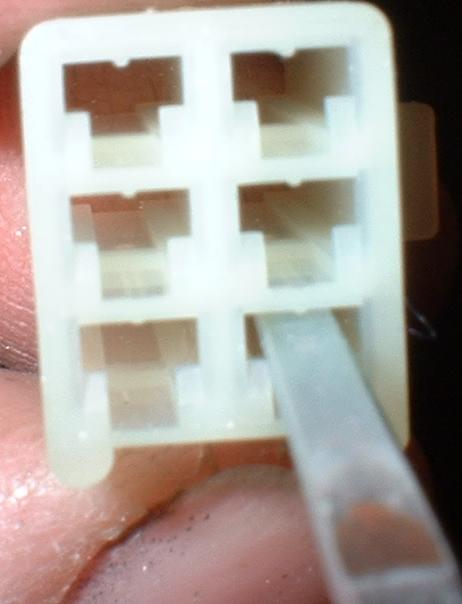
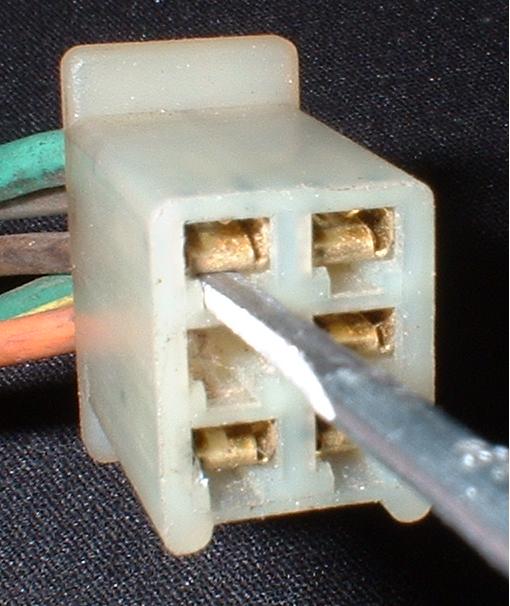
This is a close up of a home made terminal release tool. It is used to release female blade type terminals from
the plug. It started out as a cotter pin that I cut on side off of and then filed it down to fit the notch in the
plug. Ideally you want the blade on this tool to be exactly the same thickness as the clearance between the
terminal and the plug. Take an old plug with you to the hardware store and find some cotter pins about the
right width and file or grind one down to fit. Since they're cheap it won't hurt much if you ruin a few in the
process.
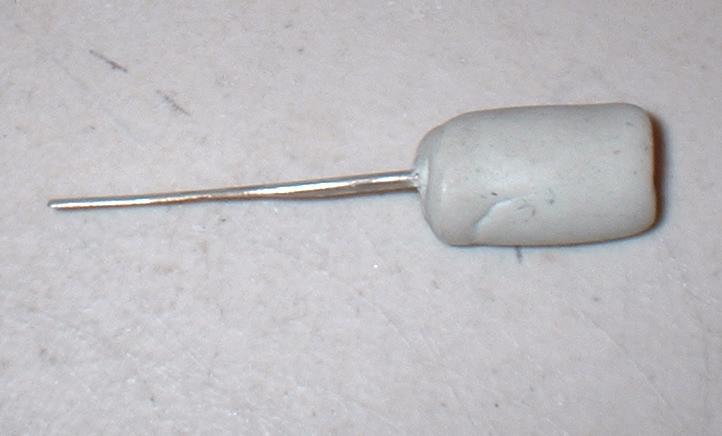
I made the handle by molding some epoxy around the end of the tool. It's not to make it easier to hold but rather to make it harder to loose. In the past
I've made these from flattened pop rivets or hammered flat small nails. I've even heard that the blades for these can be made from street sweeper bush
bristles but I've not been able to confirm this. For more information on how to make one of these scroll down on this page to the tools construction section.
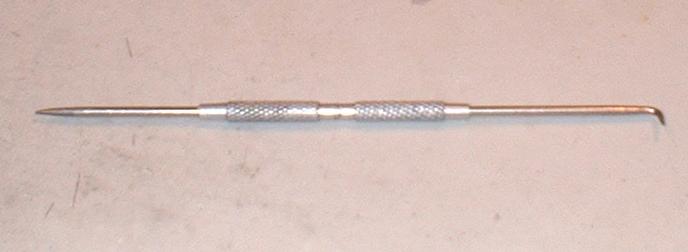
Probes like this can be found at any tool store for a few dollars. I bought this one off a Mac Tools truck
probably 25 years ago. The straight end has been reground more than once.
probably 25 years ago. The straight end has been reground more than once.
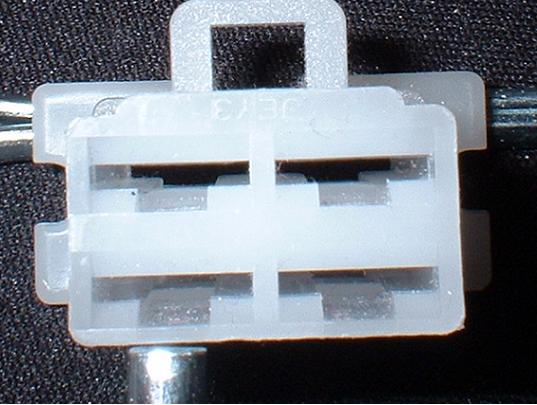
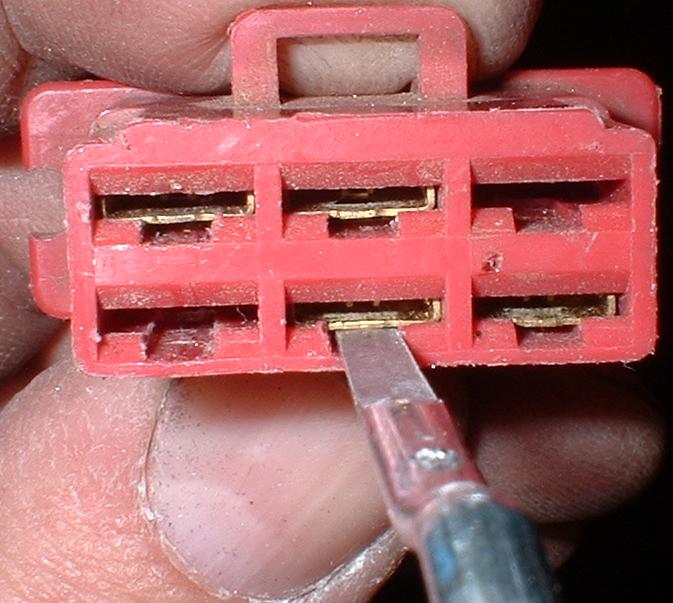
You can use a probe like this to release male blade terminals from the plugs. Push the locking tab in and the terminal will slide right out. That is if it is
not melted into the plug...
Also if you have a terminal that won't stay in the plug you can use the point of this tool to give the locking tab and extra bit of set to keep it from sliding
out.
not melted into the plug...
Also if you have a terminal that won't stay in the plug you can use the point of this tool to give the locking tab and extra bit of set to keep it from sliding
out.
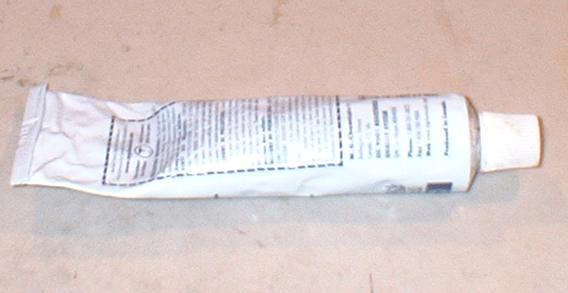
Dielectric grease. It's not cheap but it won't break you to buy a few ounces either. Look for the 5+ ounce tubes,
the little tubes smaller than an ounce are too expensive and you will use a couple of them before you get very far
into the job. Don't scrimp, always buy the big tube. After you've done a couple plugs, you'll likely end up
packing all the rest.
the little tubes smaller than an ounce are too expensive and you will use a couple of them before you get very far
into the job. Don't scrimp, always buy the big tube. After you've done a couple plugs, you'll likely end up
packing all the rest.
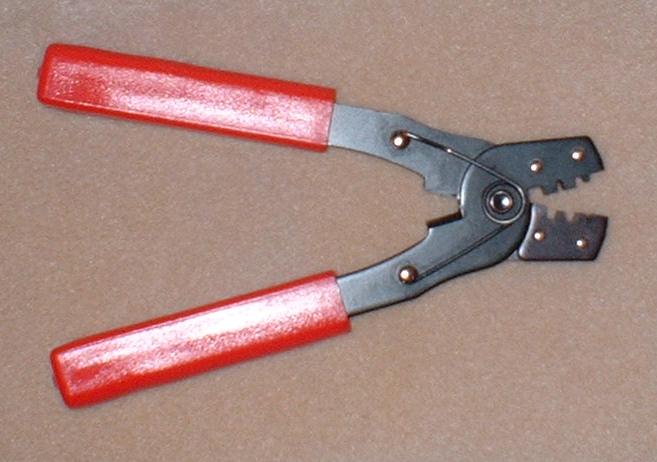
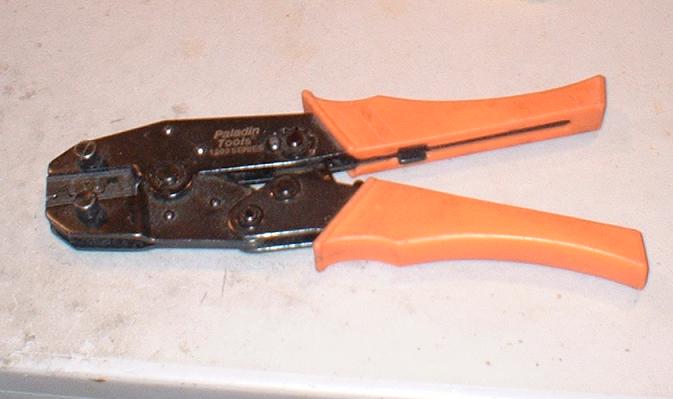
Crimpers: The one on top used to be pretty cheap but now they cost as much as the better ratcheting type.
The one at the bottom cost me $60 and was worth the money. At the time there weren't any other choices
under 150 bucks. Now you can find a nice tool in between these two at NAPA auto parts stores and other tool
vendors. One advantage of the cheap tool is it will get into tighter working spaces than the heavy ratcheting
crimpers.
If you don't get one of my crimper you need to ask for crimper for open barrel terminals. Some tool stores call
these OEM terminal crimpers. Click on and enlarge the pic of the top crimper and take a close look at the
jaws, the crimp section has a rounded heart shape and rolls the top of the terminal into the wire during the
crimping process.
| You can click on thumbnails to see the full sized pictures. |
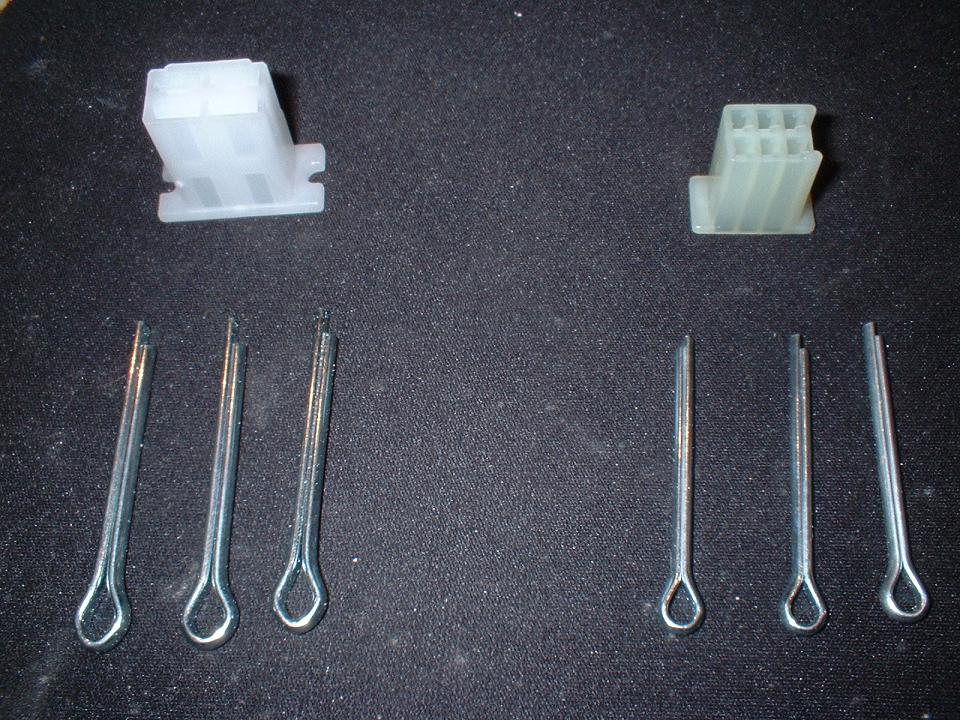

If you can take a plug with you to the hardware store to use as a gage when selecting the cotter pin you are going to
use.
The cotter pin pictured here is just about perfect for width but it's a bit to thick and will have to be ground down.
use.
The cotter pin pictured here is just about perfect for width but it's a bit to thick and will have to be ground down.
The pin that was closest fit here was both too thick and too wide and will require more work to make it fit.
Since they're cheap buy a few extra to experiment on. All 6 of these cost me $1.20 at the hardware store.
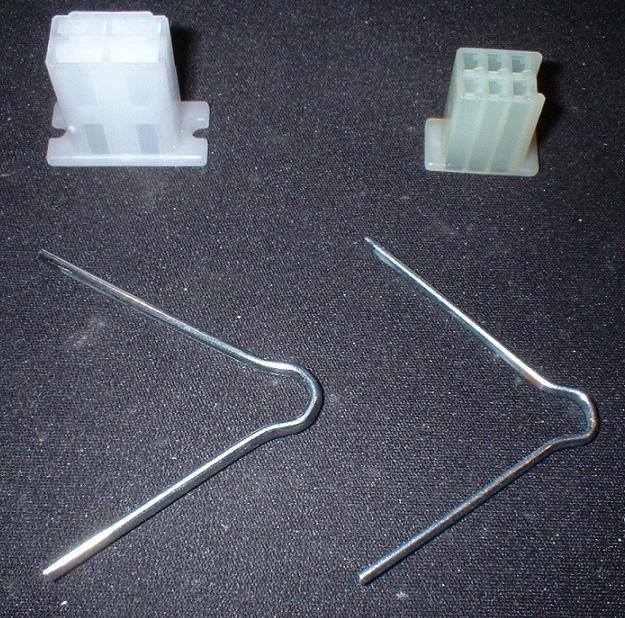
Bend the pins open
Then cut them in half at the bend
Here you can see how much metal must come off the pin to make it fit the slot.
This part will require some imagination on your part. I roughed out the relieved sections with a belt sander and finished
with a file. This time I got them both right on the first try but this isn't usually the case. You can see in the 2 sets of
pins how much metal was removed.
with a file. This time I got them both right on the first try but this isn't usually the case. You can see in the 2 sets of
pins how much metal was removed.
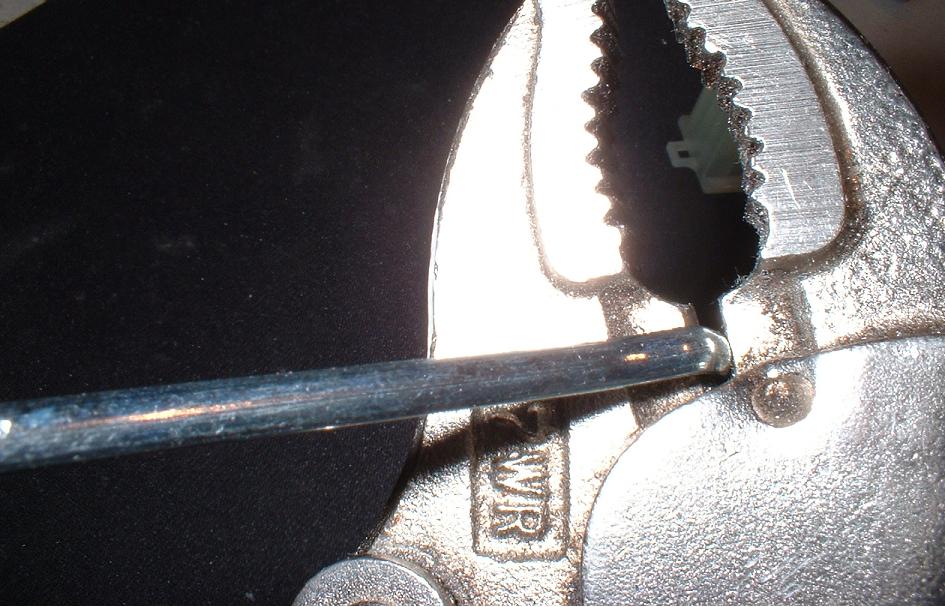
The release pin should be a slight tight fit top to bottom of the slot and a close fit side to side.
When you have the tool right you can roll the end around to make a loop or epoxy it up to make
a handle like I did. Either way these are very useful items in your toolbox.
When you have the tool right you can roll the end around to make a loop or epoxy it up to make
a handle like I did. Either way these are very useful items in your toolbox.
I was going to start this section with how to clean connections then move into replacing ones that were too bad to fix but I chose to start with the
stator and rectifier plugs on my 1975 GL1000 Goldwing and there really wasn't any terminals in those plugs worth saving. Click here for step-by
step instructions to replace bad connectors.
More to come soon...
stator and rectifier plugs on my 1975 GL1000 Goldwing and there really wasn't any terminals in those plugs worth saving. Click here for step-by
step instructions to replace bad connectors.
More to come soon...

Deoxit electrical contact cleaner. This stuff is just flat amazing and it's the only electrical contact
cleaner I recommend for use on motorcycles. It can be used on connections you cannot take apart and
on switches. Do not use it on breaker point ignitions or mechanical voltage regulators but it's great
everywhere else. I don't carry it because I'm not willing to deal with the hassles of shipping aerosol
spray cans. I use it on my bikes and I cannot recommend it any higher.
| Terminal release tool construction |
A good volt/ohm meter will make solving charging problems much easier. Most places only carry digital meters but I've found analog meters
much better for working on bikes. I've considered carrying meters but I don't really want the deal with it so I've found a really good meter
cheap and you can get it at Amazon.com.
much better for working on bikes. I've considered carrying meters but I don't really want the deal with it so I've found a really good meter
cheap and you can get it at Amazon.com.